I have been using testNG for more than 10 years and it is still my first choice when I’m working on a Java test project. It’s inspired in jUnit and nUnit, but it’s add some interesting features that, even though are now part of jUnit, many years ago where unique to testNG. The tool is easy to understand, flexible and open source, and one of the most powerful features is the built in annotations support , which makes the configuration effort of our test suites and test executions simple.
In this blog post I will explain the main features, some examples and project downloads for you to practice.
- Getting Started with testNG
- Create Test Cases Using TestNG Annotations
- Assertions in TestNG
- Create an XML test suite on testNG
- Executing a testNG test suite
- Prioritizing Tests in TestNG
- TestNG Annotations
- Grouping tests with testNG
- How to send a parameter to a test case with testNG?
- TestNG interview questions
- What is TestNG framework?
- How do you run a test in TestNG?
- How do you set up test data for a TestNG test?
- What is the difference between @BeforeMethod and @BeforeClass in TestNG?
- How do you pass parameters to a TestNG test?
- What is the difference between @Test and @BeforeMethod annotations in TestNG?
- How do you configure testNG listeners?
- How do you define a test group in TestNG?
- How do you generate a test report in TestNG?
Contents
- 1 Getting Started with testNG
- 2 Create Test Cases Using TestNG Annotations
- 3 Assertions in TestNG
- 4 Create an XML test suite on testNG
- 5 Executing a testNG test suite
- 6 Prioritizing Tests in TestNG
- 7 TestNG Annotations
- 8 Grouping tests with testNG
- 9 How to send a parameter to a test case with testNG?
- 10 TestNG interview questions
- 10.1 What is TestNG framework?
- 10.2 How do you run a test in TestNG?
- 10.3 How do you set up test data for a TestNG test?
- 10.4 What is the difference between @BeforeMethod and @BeforeClass in TestNG?
- 10.5 How do you pass parameters to a TestNG test?
- 10.6 What is the difference between @Test and @BeforeMethod annotations in TestNG?
- 10.7 How do you configure testNG listeners?
- 10.8 How do you define a test group in TestNG?
- 10.9 How do you generate a test report in TestNG?
Getting Started with testNG
How to install the testNG Eclipse Plugin
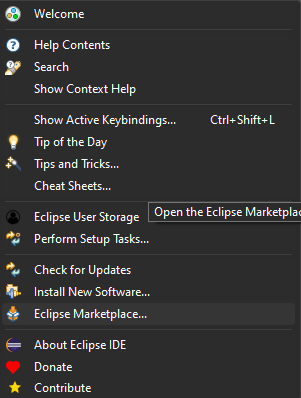
Installing the testNG eclipse plugin is easy, we just need to install it from Eclipse Marketplace, for it, we go to Help->Eclipse Marketplace:
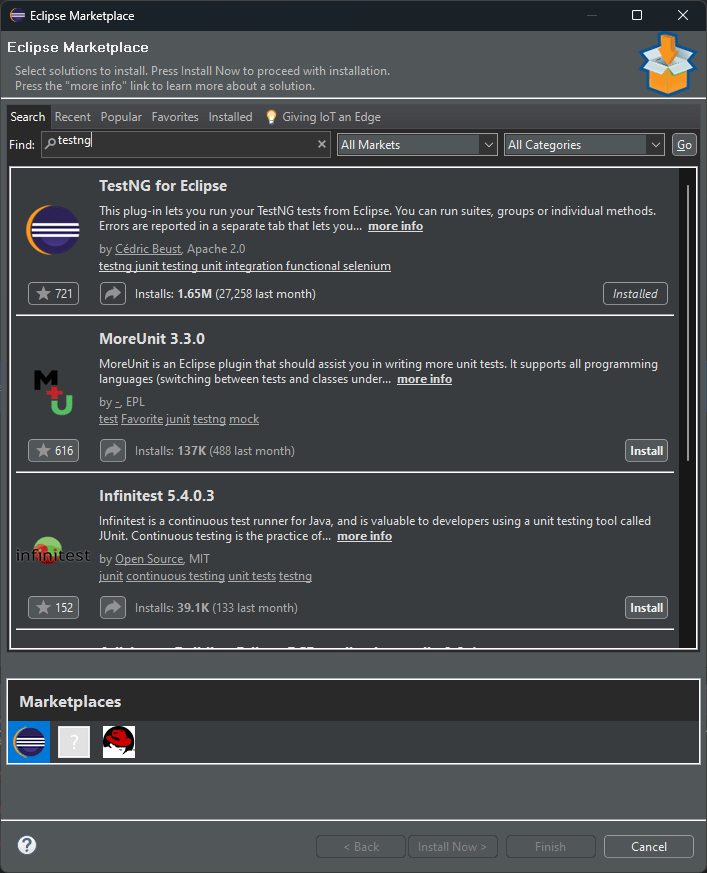
Once the Eclipse Marketplace opens, we search for testNG and click on Install:
Now we just need to follow the installation steps, trusting the developer to allow Eclipse install the extension without problems.
Creating our first testNG project
Creating a new project is easy, for this example we are going to use maven, a package manager for java, which will install the testNG libraries in our project.
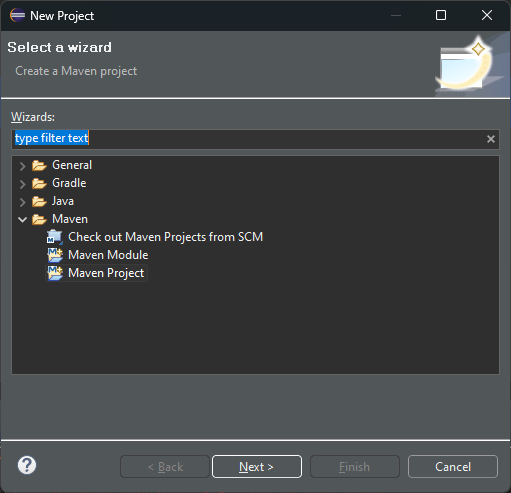
In Eclipse, go to File->New->Project
After that, we choose Maven from the list:
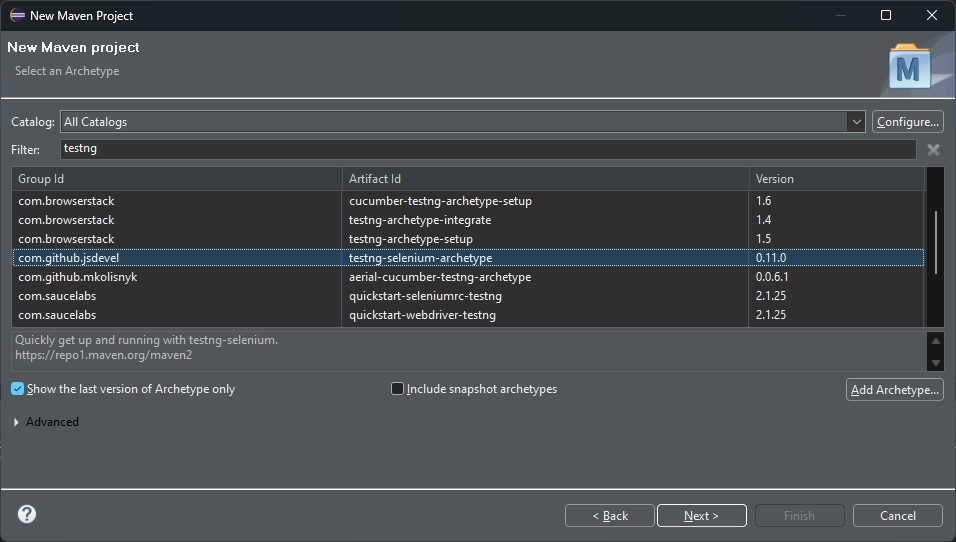
In the window that appears, we choose the testng archetype, which is a template for selenium testNG projects:
Then we have to choose the groupid and artifact name, and press finish.
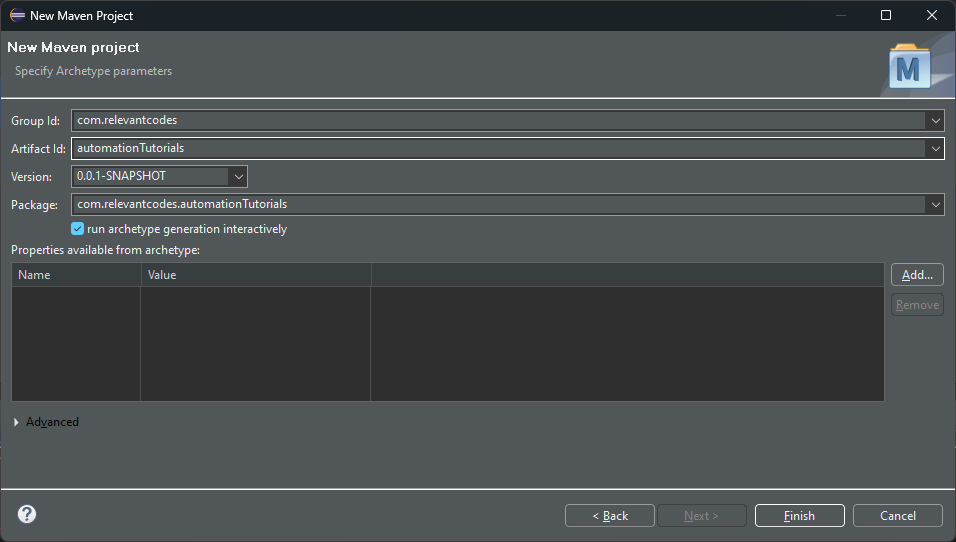
Now, our project will be create on eclipse.
How to add testNG maven dependency
Once we create our test project, we must check that the testNG dependency is present. As we used the testng archetype, it is created by default on our pom.xml file, please check that the scope test is removed so we can use testng in the whole project.
Our pom.xml should look like this:
<?xml version="1.0" encoding="UTF-8"?>
<project xmlns="http://maven.apache.org/POM/4.0.0"
	xmlns:xsi="http://www.w3.org/2001/XMLSchema-instance"
	xsi:schemaLocation="http://maven.apache.org/POM/4.0.0 http://maven.apache.org/xsd/maven-4.0.0.xsd">
	<modelVersion>4.0.0</modelVersion>
	<groupId>com.relevantcodes.com</groupId>
	<artifactId>seleniumdemo</artifactId>
	<packaging>jar</packaging>
	<version>1.0-SNAPSHOT</version>
	<name>seleniumdemo</name>
	<url>http://maven.apache.org</url>
	<properties>
		<maven.compiler.target>1.8</maven.compiler.target>
		<maven.compiler.source>1.8</maven.compiler.source>
		<project.build.sourceEncoding>UTF-8</project.build.sourceEncoding>
	</properties>
	<dependencies>
		<dependency>
			<groupId>junit</groupId>
			<artifactId>junit</artifactId>
			<version>4.13.1</version>
		</dependency>
		<dependency>
			<groupId>org.seleniumhq.selenium</groupId>
			<artifactId>selenium-java</artifactId>
			<version>3.141.59</version>
		</dependency>
		<dependency>
			<groupId>org.testng</groupId>
			<artifactId>testng</artifactId>
			<version>6.8</version>
		</dependency>
	</dependencies>
</project>
As a final step, we will run “maven install” to download all our needed dependencies, for this we right click the pom.xml file and execute Run As -> Maven Install.
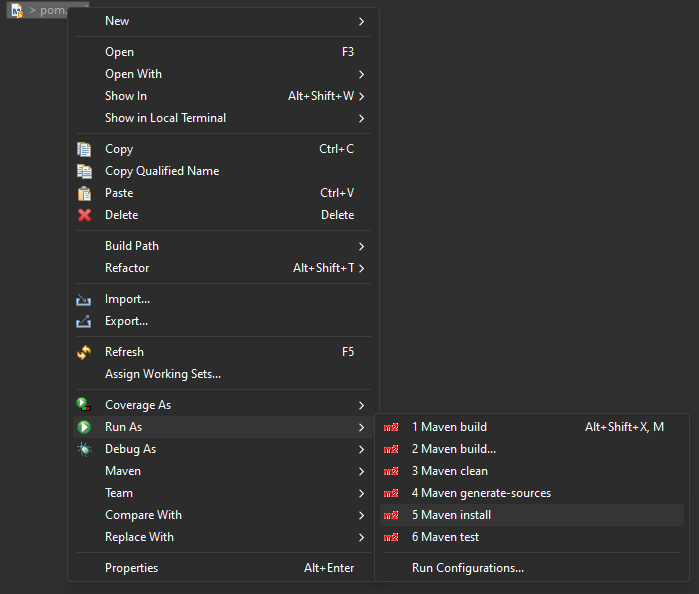
Our project will be build and all the dependencies will be created.
Create Test Cases Using TestNG Annotations
For this example I will assume that you know how to use Selenium Webdriver, if not, don’t miss my free tutorial to get started with Selenium.
A selenium test case in Java will look like this:
WebDriver driver;
    public void myFirstTest()
    {
        driver = new ChromeDriver();
        driver.get("https://google.com");
        driver.findElement(By.name("q")).click();
        driver.findElement(By.name("q")).sendKeys("relevant codes test automation");
        driver.findElement(By.name("q")).submit();
    }
That test will create a new Selenium Webdriver instance and then follow the steps:
- Navigate to google.com
- Write “relevant codes web automation” in the search bob
- Click on submit
For this tutorial, we will create a file named SeleniumTests.java with that code.
In a standard Java project, we must have a main() method to execute this, but we want to use something more configurable and have more complex scenarios, we must use a test executor. As I said before, testNG supports annotations, but…
What is an annotation?
An annotation in Java is basically metadata that can be added to our code, like tags that we can use to specify certain things in our methods. In testNG the annotations are specified with a @ followed with the annotation name.
Adding the test annotation to our testNG test
In order to tell testNG that the above method is a test, we have to add the @test annotation to it:
WebDriver driver;

    @Test
    public void myFirstTest()
    {
        driver = new ChromeDriver();
        driver.get("https://google.com");
        driver.findElement(By.name("q")).click();
        driver.findElement(By.name("q")).sendKeys("relevant codes test automation");
        driver.findElement(By.name("q")).submit();
    }
Now, we can execute this test using the Eclipse testNG plugin we installed before, to do that, we can just rich click the java file created before and select Run As -> testNG test
Assertions in TestNG
TestNG has support for multiple types of assertions, for example, some of them are:
- assertTrue
- assertEquals
- assertNotSame
For this test we are going to validate that the first H3 of the results page contains the word “Relevant”:
    WebDriver driver;
    @Test
    public void myFirstTest()
    {
        driver = new ChromeDriver();
        driver.get("https://google.com");
        driver.findElement(By.name("q")).click();
        driver.findElement(By.name("q")).sendKeys("relevant codes test automation");
        driver.findElement(By.name("q")).submit();
        Assert.assertTrue(driver.findElement(By.xpath("//h3")).getText().contains("Relevant"));
    }
Now we can execute the test with Run As -> testNG test and see the results in the testNG output:

Create an XML test suite on testNG
In a real world scenario, we are going to have multiple test cases to execute, not only one, so let’s create 2 more test cases:
public class SeleniumTests {

	WebDriver driver;

	@BeforeMethod
	public void start() {
		driver = new ChromeDriver();
        driver.get("https://google.com");
	}

	@AfterMethod
	public void end() {
		driver.close();
	}

	@Test
    public void myFirstTest()
    {
        driver.findElement(By.name("q")).click();
        driver.findElement(By.name("q")).sendKeys("relevant codes test automation");
        driver.findElement(By.name("q")).submit();
        Assert.assertTrue(driver.findElement(By.xpath("//h3")).getText().contains("Relevant"));
    }

	@Test
    public void mySecondTest()
    {
        driver.findElement(By.name("q")).click();
        driver.findElement(By.name("q")).sendKeys("selenium webdriver");
        driver.findElement(By.name("q")).submit();
        Assert.assertTrue(driver.findElement(By.xpath("//h3")).getText().contains("Selenium"));
    }

	@Test
    public void myThirdTest()
    {
        driver.findElement(By.name("q")).click();
        driver.findElement(By.name("q")).sendKeys("USA");
        driver.findElement(By.name("q")).submit();
        Assert.assertTrue(driver.findElement(By.xpath("//h3")).getText().contains("United States"));
    }


}
Now, if we execute the tests, we are going to have 3 tests executed on Chrome, but what if we want to execute certain tests? Or if we want to execute them in a particular order?
To achieve that, we must create a testNG Suite. A test suite is an XML file that looks like:
<!DOCTYPE suite SYSTEM "https://testng.org/testng-1.0.dtd" >

<suite name="MyFirstSuite" verbose="1" >

  <test name="MyRegression">
    <classes>
      <class name="com.relevantcodes.selenium.SeleniumTests"/>
    </classes>
  </test>
</suite>
In this case, we are telling testNG that we want to execute all the test cases in the “com.relevantcodes.selenium.SeleniumTests” class. To execute the test suite, me should right click on the XML file and select Run As -> TestNG Suite
The different parameters and configurations are very well explained in the testNG documentation. Some of the most used configurations are:
Include only certain methods:
<class name="test.Test1">
      <methods>
        <include name="m1" />
        <include name="m2" />
      </methods>
    </class>
Include only certain classes:
<test name="Regression1">
    <classes>
      <class name="test.sample.ParameterSample"/>
      <class name="test.sample.ParameterTest"/>
    </classes>
Executing a testNG test suite
To execute a test suite we have to right click the XML suite file and select Run As -> TestNG Suite
Executing test cases in parallel
We have many possible configurations to execute our test cases in parallel with testNG. For instance, we can execute test classes in parallel, so if we have multiple classes with many tests on them, each one of the classes will be executed in parallel but the methods inside them will be executed in sequence.
Run testNG classes in parallel
<suite name="Relevant Codes Suite" parallel="classes" thread-count="5">
Runnint testNG methods in parallel
<suite name="Relevant Codes Suite" parallel="methods" thread-count="5">
Runnint testNG tests in parallel
<suite name="Relevant Codes Suite" parallel="tests" thread-count="5">
Prioritizing Tests in TestNG
TestNG also allow us to prioritize test cases, so we can execute them in a particular order. To achieve this we have to pass the priority parameter to the test annotation:
	WebDriver driver;

	@BeforeMethod
	public void start() {
		driver = new ChromeDriver();
        driver.get("https://google.com");
	}

	@AfterMethod
	public void end() {
		driver.close();
	}

    @Test (priority=1)
    public void myFirstTest()
    {
        driver.findElement(By.name("q")).click();
        driver.findElement(By.name("q")).sendKeys("relevant codes test automation");
        driver.findElement(By.name("q")).submit();
        Assert.assertTrue(driver.findElement(By.xpath("//h3")).getText().contains("Relevant"));
    }

    @Test (priority=3)
    public void mySecondTest()
    {
        driver.findElement(By.name("q")).click();
        driver.findElement(By.name("q")).sendKeys("selenium webdriver");
        driver.findElement(By.name("q")).submit();
        Assert.assertTrue(driver.findElement(By.xpath("//h3")).getText().contains("Selenium"));
    }

    @Test (priority=2)
    public void myThirdTest()
    {
        driver.findElement(By.name("q")).click();
        driver.findElement(By.name("q")).sendKeys("USA");
        driver.findElement(By.name("q")).submit();
        Assert.assertTrue(driver.findElement(By.xpath("//h3")).getText().contains("United States"));
    }
Now, if we execute the test suite, our tests will be executed like this:

As we can see, the order is now myFirstTest, myThirdTest and mySecondTest.
TestNG Annotations
As you can see, testNG annotations allow us to perform several kind of actions in our test cases and suites, let’s see the most common testNG annotations;
Most common testng Annotations
@BeforeMethod annotation
This annotation will test testNG that a method needs to be executed before each one of the methods, in our example, we use that annotation to open the browser.
@AfterMethod annotation
This annotation will test testNG that a method needs to be executed aftereach one of the methods, in our example, we use that annotation to close the browser.
@BeforeClass annotation
This annotation will make testNG execute the method once before the first method of the class is executed
@AfterClass annotation
This annotation will make testNG execute the method once after the first method of the class is executed
@DataProvider Annotation
This annotation is used to pass parameters to our test cases, with this we can achieve something similar to what we do with Scenarios Outlines in Gherkins.
Grouping tests with testNG
One of the most common things we usually need to do with testNG, is to group test cases into different categories so we can then run them by category. As an example, I use to group my automated test cases into at least this 3 main categories:
- Regression
- Smoke
- Sanity
So to achieve this we can use the @groups tag to our test case:
WebDriver driver;
     @Test(groups = { "smoke" })
     public void myFirstTest()
    {
        driver.findElement(By.name("q")).click();
        driver.findElement(By.name("q")).sendKeys("relevant codes test automation");
        driver.findElement(By.name("q")).submit();
        Assert.assertTrue(driver.findElement(By.xpath("//h3")).getText().contains("Relevant"));
    }

    @Test(groups = { "regression" })
    public void mySecondTest()
    {
        driver.findElement(By.name("q")).click();
        driver.findElement(By.name("q")).sendKeys("selenium webdriver");
        driver.findElement(By.name("q")).submit();
        Assert.assertTrue(driver.findElement(By.xpath("//h3")).getText().contains("Selenium"));
    }
How to send a parameter to a test case with testNG?
It’s always a good idea to parameterize our test cases, so we can read parameters from external files, databases, csv or json files. If we want to do this, we can use the @parameters annotation like this:
WebDriver driver;
@Test(groups = { "regression" })
@parameters({"parame_1"})
 public void myFirstTest()
    {
        driver.findElement(By.name("q")).click();
        driver.findElement(By.name("q")).sendKeys("param_1");
        driver.findElement(By.name("q")).submit();
        Assert.assertTrue(driver.findElement(By.xpath("//h3")).getText().contains("param_1"));
    }
TestNG interview questions
If you are having a test automation interview, you might have to answer questions about testNG, so I compiled 10 of my most frequent testNG interview questions:
What is TestNG framework?
Answer: TestNG is a testing framework for Java programming language that is used to write, run and generate test reports for automated tests.
How do you run a test in TestNG?
Answer: Tests can be run in TestNG by right-clicking on the test class or the testng.xml file in the project and selecting the “Run As” option, then choosing “TestNG Suite”.
How do you set up test data for a TestNG test?
Answer: Test data can be set up for a TestNG test using the @DataProvider annotation, which provides a data source for the test method. The data can be read from external sources such as a CSV file or a database.
What is the difference between @BeforeMethod and @BeforeClass in TestNG?
Answer: @BeforeMethod is run before each test method while @BeforeClass is run once before all the test methods in the test class.
How do you pass parameters to a TestNG test?
Answer: Parameters can be passed to a TestNG test using the @Parameters annotation, which takes values from the testng.xml file.
What is the difference between @Test and @BeforeMethod annotations in TestNG?
Answer: @Test is used to mark a method as a test method, while @BeforeMethod is used to run a method before each test method.
How do you configure testNG listeners?
Answer: Test listeners can be configured in TestNG by implementing the org.testng.ITestListener interface and adding the listener to the testng.xml file.
How do you define a test group in TestNG?
Answer: A test group in TestNG is defined using the @Test annotation and its “groups” attribute. Tests can then be executed based on their group membership.
How do you generate a test report in TestNG?
Answer: A test report in TestNG can be generated by using a reporting tool such as the default TestNG HTML report or by integrating with tools such as Jenkins or Allure.
Pingback: Software test pyramid
Pingback: Python for tester: A must have skill