
Before working with Selenium with Python, during my more than 15 years of experience in test automation, I’ve worked on dozens of projects with countless technologies involved. I still remember those days when I used VB Script, QTP, Selenium RC, and other similar tools, and when test automation was not even a thing, just something that some “cool” companies wanted for their products.
Things have changed, and now every serious software project has test automation in place, the most popular tools such as Selenium have evolved, and we are talking about CI/CD, automated tests, performance tests, API tests, etc on every single software project in which we are involved.
If you are reading this, you probably are a test automation engineer or you want to become one (congratulations, it’s a great career!), and the purpose of this selenium with Python course is to teach you from scratch how to create a test automation framework with python from zero, without any previous test automation knowledge.
Anyways, there are some prerequisites that you should meet before trying to take this course frustration free, let’s talk about that.
- Previous requirements for this Python Selenium training
- What is test automation?
- What is Selenium Webdriver?
- Why Python?
- Installing our IDE
- Installing pip
- Installing a python virtual environment
- Automating our first script
- Working with web elements in Selenium Webdriver
- The automation framework architecture
- The pageobject pattern
- Implementing test case with unit test in python
- The end… for now
Contents
- 1 Previous requirements for this Python Selenium training
- 2 What is test automation?
- 3 What is Selenium Webdriver?
- 4 Why Python?
- 5 Installing our IDE
- 6 Installing pip
- 7 Installing a python virtual environment
- 8 Automating our first script
- 9 Working with web elements in Selenium Webdriver
- 10 The automation framework architecture
- 11 The pageobject pattern
- 12 Implementing test case with unit test in python
- 13 The end… for now
Previous requirements for this Python Selenium training
First, for this python tutorial you need to have basic knowledge of software development, I recommend understanding what object-oriented programming is, what a class is, what a method does, simple structures such as if, else, while, for, etc.
I recommend being proficient in the use of some IDE, during this training I’ll use VSCode but you can any IDE that you want.
Of course, I also suggest understanding some python basics, but any previous experience in programming will be fine as Python is an easy-to-learn language.
With that being said, let’s start with some definitions.
All the code, examples and exercises will be available on my git repository
What is test automation?

When we have a software project we have the need of assuring that the project is good enough in terms of quality, that it does what it is intended to do, and that it doesn’t have any important failures, bugs, or errors.
This is important because when we use an app that fails or has errors, we change the perception about the company that provides that software, for example, I do not want to flight with a company whose app provides wrong flight numbers or departure times, I just could not trust it. Could you?
There are other circumstances, more important than just quality perception, where quality plays an important role in the application development process. Just to mention something, self-driving cars, medical devices, etc, are good examples of software where a failure can cause severe problems to the company (and users).
This is why companies are investing tons of money in software testing, to assure that they are delivering the best user experience and that the applications are doing what they are supposed to do.
But there is a problem: As the development keeps going, and more functionalities are being implemented and added to existing software, the number of test cases that need to be executed by a test analyst are exponentially increased and the time that we need to test everything or at least to test the minimum necessary to assure the product quality is significantly increased.
Companies can not spend weeks testing a feature before launching it because the competitors will deliver first, and they will be always in second place.
So this is where test automation comes into play, if we can automate all the validations, we can execute our test cases when we want, where we want, many times per day, and in parallel! So if I needed 3 engineers a whole day to execute 100 test cases, now I can do that in 15 minutes in parallel with the press of a button.
What is Selenium Webdriver?
Selenium Webdriver is an open-source tool that was created to automate web applications with different purposes, such as process automation (RPA), scripting, and scrapping, but mainly, for test automation. Some years ago, the first version of selenium (after Selenium IDE), was named Selenium RC, and it used javascript code to communicate with all the browsers. Today, selenium introduced the Webdriver protocol, so it interacts directly with the browsers without any intermediaries.
Relevant Codes
Selenium allows us to automate the actions that a user performs on a browser, but with a script. For example, with selenium, I can open a webpage, click a link, write on a textbox, press a button, etc.
As you can see, with only those simple actions we can do almost everything, like logging in, registering, completing forms, navigating, etc.
Why Python?
Well, the short answer here is Why not? But I’ll provide more detail about why creating test cases using selenium and Python is a good choice.
First, Python is a great language for learning, (that’s why I use it on this selenium with python free course) it’s easy to write and it’s easy to read, plus, there are plenty of free resources on youtube and on the web for learning Python.
It has a huge community, as an open-source project you can find almost any answer on the web.
There are many companies requiring this skill (Automation with python) in the market
Installing our IDE
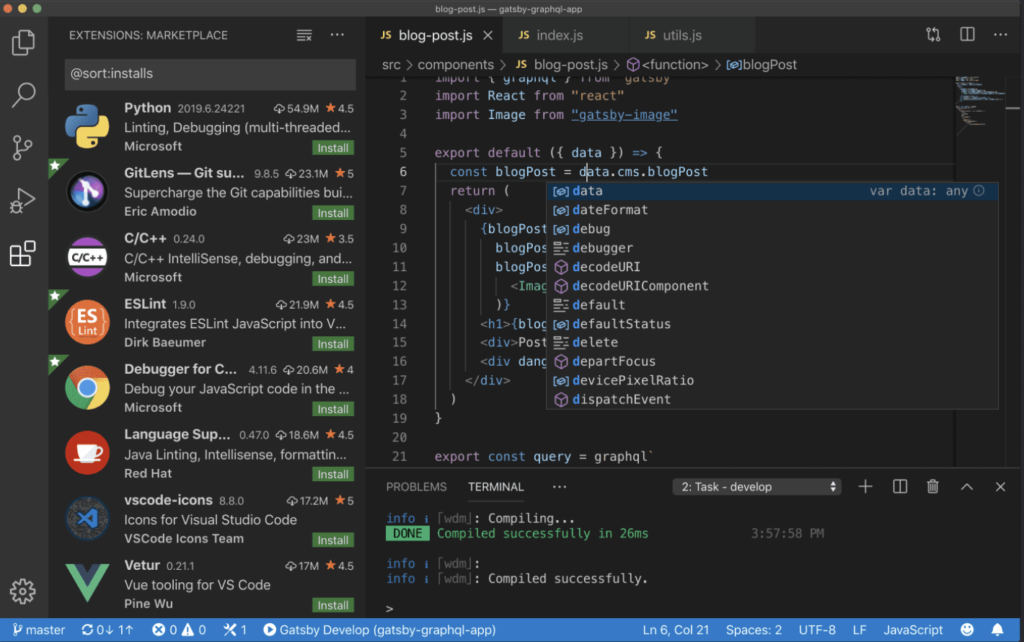
The first step to start this selenium online training is to install our IDE, for this training we are going to use VSCode but you can use any IDE that supports python.
To install the IDE go to VSCode website and download the version for your operative system.
After you install your IDE, you should install some extensions to make your life easier, so click on the extension’s icon on the left and install the following extensions by searching them on the search bar and clicking on the Install link:
- Python (By Microsoft)
Installing pip
PIP is a tool that allows us to install dependencies in a very easy way. A dependency is any library that we want to use, for example, we want to use selenium on our project, so instead of downloading it, adding it to our project, etc, we can use pip and it will do that for us, automatically.
To install pip we should execute the following on our terminal:
$ python -m ensurepip --upgrade
Ok, now we have pip for dependencies management and the IDE ready to start writing code, but there is something else we can do to make our life easier: Let’s install a virtual environment.
Installing a python virtual environment
A virtual environment is a virtual environment. Now, seriously, a virtual environment allows us to have specific configurations of python and dependencies for a specific project.
Let’s say that you have multiple projects, and on one of them you want to use python 2.6 with selenium 2.0, and in another one, you need python 3 with selenium 3. Without virtual environments, you should have more than one computer to achieve this, with different installations of python and selenium, but with virtual environments, you can have both installations on the same computer and choose which one you want for each project.
I wish I could have that for my home office, a virtual environment for working and another one for gaming, in a single room.
So let’s create a project first so we can start working!
Open a terminal and create a folder for this python relevant code course:
mkdir python_rc
We use mkdir to create the directory.
Now in VSCode, go to file, open folder, and open the directory we have just created. Now we can use the VSCode built-in terminal, to open it, go to Terminal->New terminal.
Now, to create our virtual environment, we need to write the following in the terminal:
python -m venv ./venv
With that, we have our virtual environment created, so we need to tell Python that we want to start working on it, so we need to activate it, to achieve this, write the following in the VSCode terminal:
source ./venv/bin/activate
The command prompt will turn in something like this:
(venv) ~/Documents/dev/Vscode/python_rc ⮀»
And voila! Everything that we do now will only affect the virtual environment, so for example, we can delete a library and that library will not affect other projects using different environments.
Automating our first script
Ok, now we have everything we need to start automating our test cases in python with a selenium web driver, let’s start with this free selenium course.
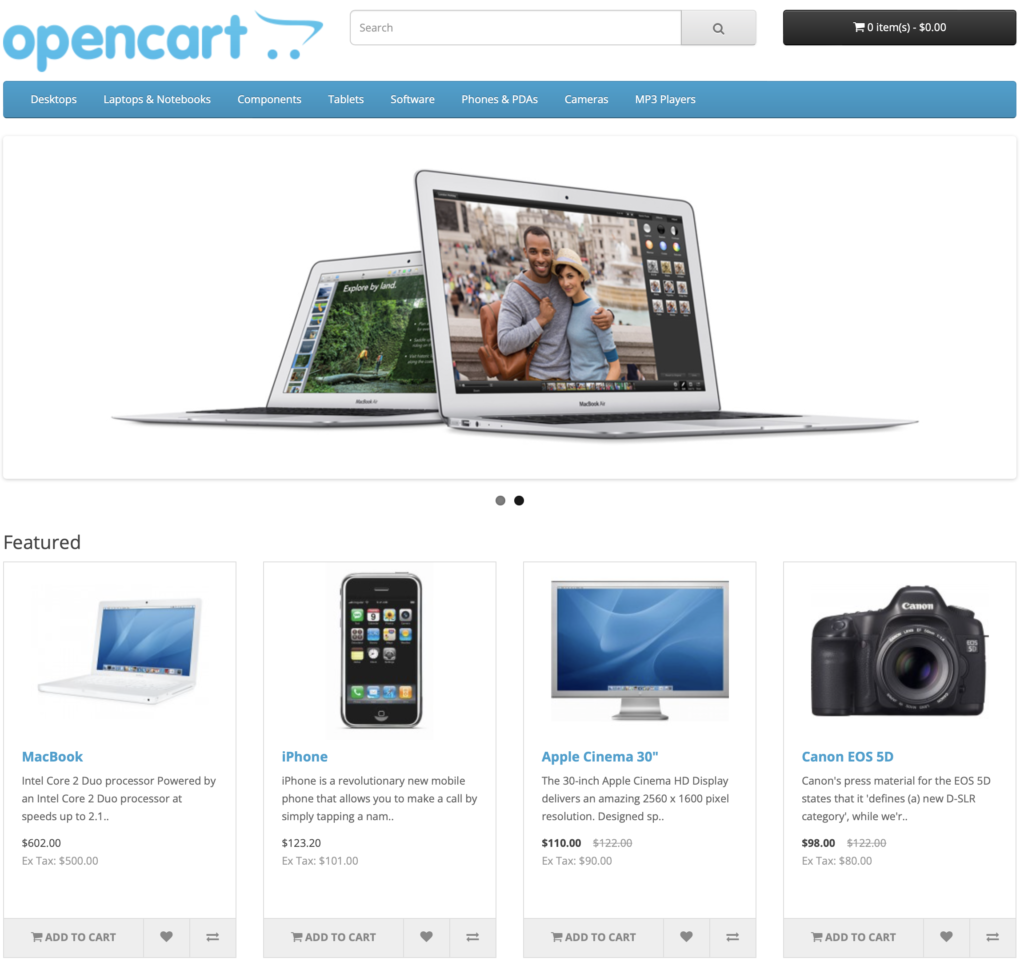
For this purpose, I installed a demo open cart site that we will use for training purposes, you can access the site in this url.
To start automating, we need to be in our IDE, and using the built-in terminal, we will add the selenium dependency (Remember to use the virtual environment created in the previous step):
pip install selenium
Now we have selenium dependencies ready to be used in our python project, let’s create a simple script for opening a website to test that everything is working fine.
For this example, we are going to use Chrome, so we need to install Chrome Driver before starting.
What is Chromedriver?
Chromedriver is the library that allows Selenium Webdriver to control Google Chrome using automation. So we need to have it installed and in our path to start automating our test cases.
Let’s go step by step:
Installing Chromedriver
1 – Identify your browser version
Open google chrome, and go to “About”, take note of the google chrome version:
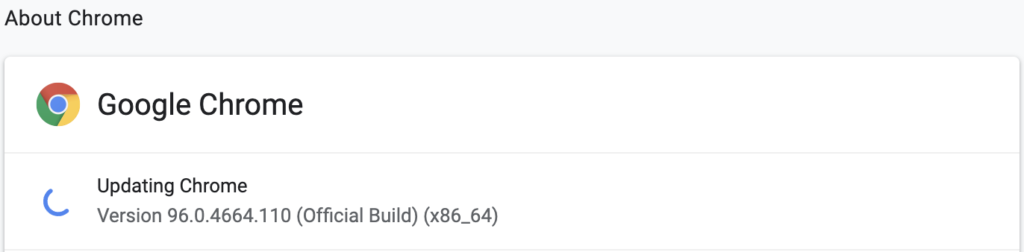
2 – Go to this link and download the version of ChromeDriver corresponding to your version of chrome:
3 – Unzip the file and save the chromedriver binary somewhere in your computer, I like to have it on “~/.webdrivers”
4 – Add the chromedriver to your path
To add it to your path, you need to edit your bash_profile file and add the binary path to it
In the terminal, execute the following to edit your bash_profile:
nano ~/.bash_profile
Then add the following line:
export PATH="/Path/to/chromedriver/:$PATH"
In my case it would be:
export PATH="~/.webdrivers/chromedriver/:$PATH"
And you are done, you have chromedriver on your path, this means that we can type “chromedriver” in any directory or call “chromedriver” from any project and it will be resolved automatically using the line you have just added to your path. It’s like saying: “Hey if I call chromedriver” use this one”.
This also allows us to update the chromedriver file that we have just saved and every project referring to chromedriver will use the updated version.
Let’s create the script:
Creating our first selenium with python script
In Visual studio code, go to file->new file and name it tests.py
On tests.py file, write the following code:
from selenium import webdriver
driver = webdriver.Chrome()
driver.get("https://selenium-training.relevantcodes.com")
driver.close()
Now, let’s execute it using python, to do this, in the vscode terminal, execute the following command:
python 'path/python_rc/tests.py'
You need to replace the path with the one corresponding to your project.
And voila! This should open a web browser, navigate to relevantcodes.com and close the browser.
Let’s analyze the code:
driver = webdriver.Chrome()
That line will create a variable named driver, and instantiate it with webdriver.Chrome(), basically, the driver is now our chromedriver.
driver.get("https://selenium-training.relevantcodes.com")
The get method allows us to open a webpage, so in this case, this is the line that opens the browser.
driver.close()
This line closes the browser after we finish our test, this will also assure that the next test cases will use an empty browser session.
Working with web elements in Selenium Webdriver
Ok, we have our first script, but it’s a little bit boring, as we only open the website and then we just close it. Let’s do something fun here.
We want to interact with the app under test, we want to click on links, fill a form, search for something, not only to see the web page.
To achieve this, we need to be able to identify the elements that we want to use, so we can tell Selenium what elements we need and what we need to do with them.
How to identify a web element in Selenium Webdriver?
We have different ways to identify an element, let’s see some of them:
Element by id:
This allows us to identify the element by its unique identifier. It’s the best approach you can use if the element has an id because it’s unique, it’s fast and it doesn’t need to load the full web pages to interact with it.
Element by name:
This is another recommended approach, it is fast but it doesn’t assure that its unique.
Element by class:
This method allows us to tell selenium that we want to interact with a certain element by its class name. It is still fast, but we could have more than one element with the same class.
Element by XPath:
This method allows us to identify an element by the position on the screen. It’s not always recommended because the position on the DOM can change and it breaks the tests, because selenium will not be able to find the element.
How to identify elements in selenium
This is relatively easy, but it’s different on each browser. For this training, I’ll use Google Chrome to show you how to identify an element id, class, or XPath.
- Open google chrome
- Open https://selenium-training.relevantcodes.com/
- Go to view-> deleloper -> developer tools
- On the windows that opens on the right, click on the following icon:
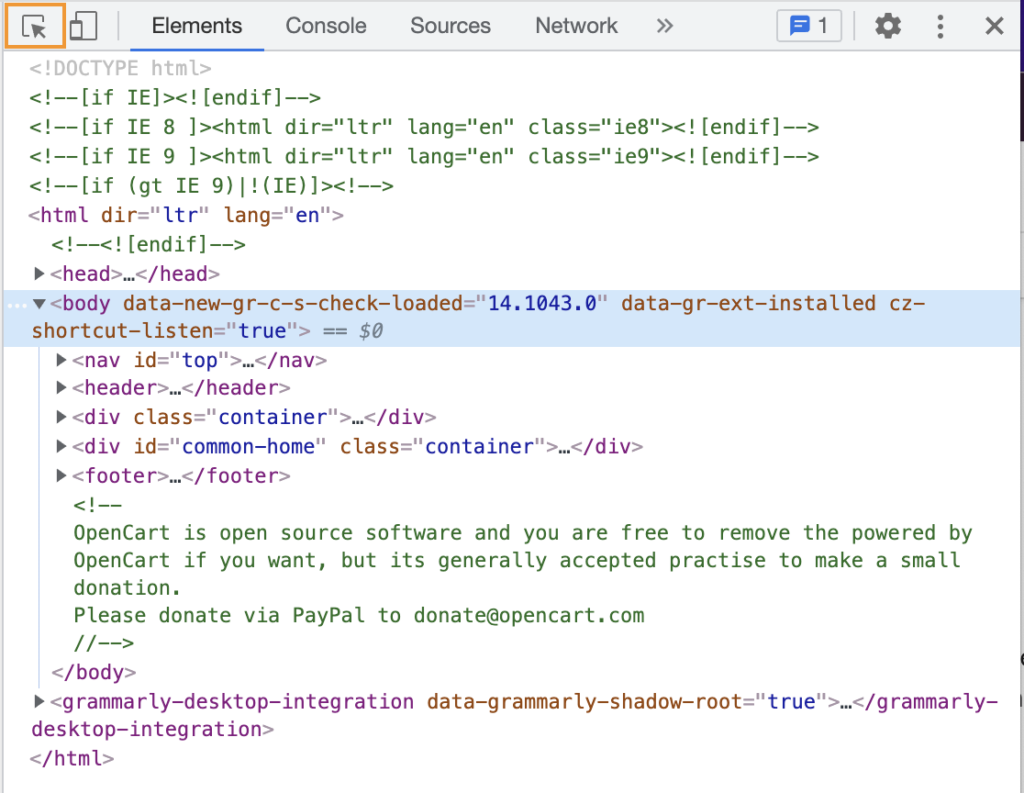
Now we can click on any element on the screen to see its information, in this case, let’s click on the search box:
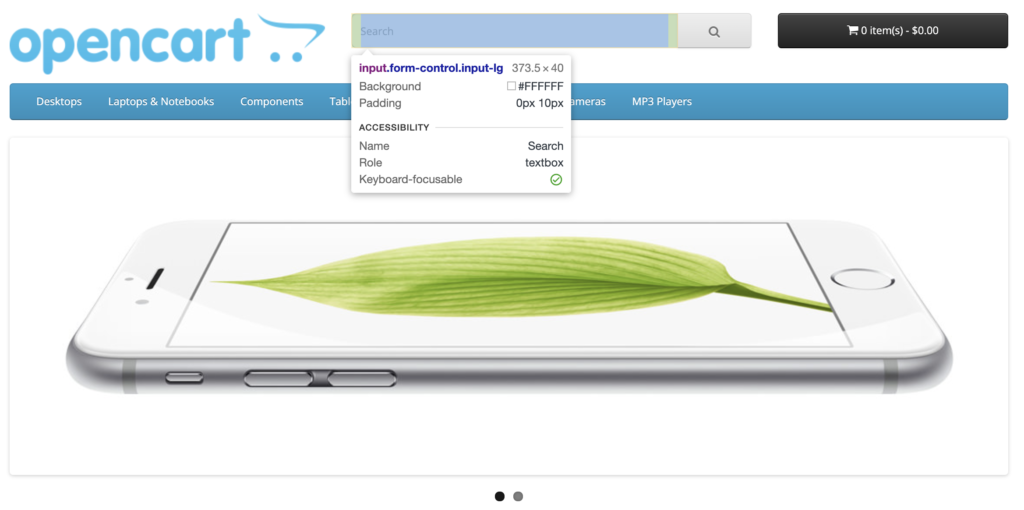
As you can see we have more information about that element, and if we look at the right where we see the source code, we will note that the element has a name that allows us to identify it:
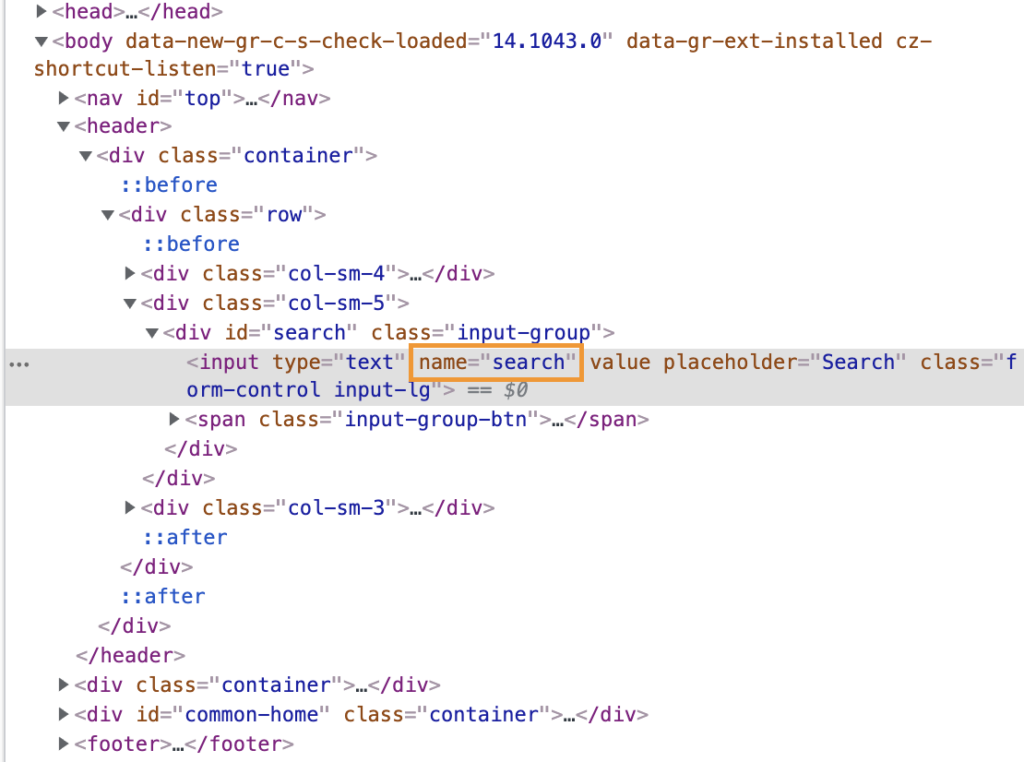
Our element’s name is: “search”
From now on, you will be able to use this technique to identify an element name, class, id, or XPath, let’s continue with our test case.
The automation framework architecture
If we are going to work on a large-scale automation project, we should take care of our code from the very beginning, following good practices is a must in every successful project.
There are some standard practices that we must follow in order to have the best from our code, let’s start with our pages organization and structure.
The pageobject pattern
In every test automation project, there are pages, screens, or page areas that your test interacts with. In order to have our code reusable, eliminating duplicate code, we can use the page object pattern.
This pattern is very easy to understand, basically, we are going to create classes for each page, or portion of the page, that we consider that needs to be modeled.
For example, let’s see the following test case:
- Go to https://selenium-training.relevantcodes.com/
- Search for iPhone
- Validate results
For this 3 steps test case, we have 2 pages involved:
- The home page
- The search results page
For the home page, we can identify one clear element that we have to interact with: The search box. On the other hand, for the results page, we have other elements, like the result itself, or the text indicating the number of results found.
As you can imagine, the search box needs to be identified so we can interact with it. This is an easy one, so let’s do it:
SEARCH_TEXTBOX = (By.NAME, ‘search’)
We are basically telling selenium that it needs to find an element, by name, named “search”. Now we need to have a way to use that element without duplicating it every time, for example, if we have more than one test cases that uses that element (multiple searches, happy paths, alternative paths), we can declare it every time inside the test case, or have an external variable taking care of it.
With the last approach, if the element changes, we can just update one variable and all our automated tests will run again, if we have the same variable declared every time, we have to update it everywhere.
Let’s create our first pageobject: The base page.
The base page will be the parent of each one of the pages we are going to create in our project, for now, we are going to keep this simple, but in the future, it will have more methods that will make our life easier.
Create a folder and name it “pages”, then create a base_page.py file, with the following content:
class BasePage(object):
    """Base class to initialize the base page that will be called from all pages"""
    def __init__(self, driver):
        self.driver = driver
After you have this class created, create another one, in the same folder, named main_page.py, that page will have the elements and the methods for our page, in this case, the search element and a method to search on the page:
from selenium.webdriver.common.by import By
from selenium.webdriver.common.keys import Keys
from pages.base_page import BasePage
class MainPage(BasePage):
    SEARCH_TEXTBOX = (By.NAME, 'search')
    """Home page action methods come here."""
    def search(self, searchText):
        """Triggers the search"""
        element = self.driver.find_element(*self.SEARCH_TEXTBOX)
        element.send_keys(searchText + Keys.ENTER)
As you can see, the page extends from base_page and exposes a method named “search” that receives a search term, write the term on the search textbox, and press enter.
After we perform a search, the page returns the results page, with the items found from the previous search, let’s create that page with the elements and methods on it (Create search_results_page.py on the same directory):
from pages.base_page import BasePage
from selenium.webdriver.common.by import By
class SearchResultsPage(BasePage):
    RESULT_COUNT = (By.CLASS_NAME, 'text-right')
    """Search results page action methods come here"""
    def result_count(self):
        element = self.driver.find_element(*self.RESULT_COUNT)
        return element.text
Do you see how this page object model works? For each page, we have a different class, that class will contain all the locators and methods that are relevant to that page and nothing else.
Now that we have our page objects, we can create our test case.
Implementing test case with unit test in python
We are going to create the same test case we used for the example above:
- Go to https://selenium-training.relevantcodes.com/
- Search for iPhone
- Validate results
To achieve that, there are 2 things that we need to do:
- To open a browser with the main page url before the test execution
- To close the browser after the test finish
Selenium provides us with 2 methods that we can override for the setup and teardown, let’s create those in our test. For this, create a test.py file in the root of your project and add the following code:
import unittest
from selenium import webdriver
class SearchTests(unittest.TestCase):
    """A sample test class to show how page object works"""
    def setUp(self):
        self.driver = webdriver.Chrome()
        self.driver.get("https://selenium-training.relevantcodes.com/")
    def tearDown(self):
        self.driver.close()
if __name__ == "__main__":
    unittest.main()
If you execute this, it will open a browser (chrome) and then it will close the browser right after that, that’s because we still don’t have any tests. Let’s write our first test case:
import unittest
from selenium import webdriver
import pages.search_results_page
import pages.main_page
class SearchTests(unittest.TestCase):
    """A sample test class to show how page object works"""
    def setUp(self):
        self.driver = webdriver.Chrome()
        self.driver.get("https://selenium-training.relevantcodes.com/")
    def test_search_in_open_cart(self):
        """Tests OpenCart search feature. Searches for the word "iPhone" then
        verified that some results show up."""
        #Load the main page. In this case the home page of https://selenium-training.relevantcodes.com/.
        main_page = pages.main_page.MainPage(self.driver)
        main_page.search("iPhone")

        result_page = pages.search_results_page.SearchResultsPage(self.driver)
        self.assertTrue("Showing 1 to 1 of 1" in result_page.result_count())
    def tearDown(self):
        self.driver.close()
if __name__ == "__main__":
    unittest.main()
Do you see how simple it is? Basically we have a test, that is a method “test_search_in_open_cart”, and in that method we call the seach method of the main page and then we validate the results.
To validate the results, we call an assertion, part of the unittest library that we imported, where we validate that the text “Showing 1 to 1 of 1” appears in the bottom of the page, indicating that we have one (and only one) result.
If you want to test this code, you can just run python test.py on the console and the test will open the browser and run on a local instance. In next chapters we will learn how to use Selenium Grid.
If you want to get my code, just download it from my git repository, but make sure that you checkout the branch “training-1.0”, which has everything we saw until this point.
To clone it, just execute the following command:
git clone https://github.com/Relevant-Codes/test--automation-tutorial.git
The end… for now

This article is a work in progress, I want to write the most complete guide to start working with selenium webdriver and python, so any feedback is more than welcome, and don’t hesitate to check this article for the next update.
Could you help me resolve this issue with the error below?
source ./venv/bin/activate
source : The term ‘source’ is not recognized as the name of a cmdlet, function, script file, or operable program. Check the spelling of the name, or if a path was included, verify that the
path is correct and try again.
At line:1 char:1
+ source ./venv/bin/activate
+ ~~~~~~
+ CategoryInfo : ObjectNotFound: (source:String) [], CommandNotFoundException
+ FullyQualifiedErrorId : CommandNotFoundException
Hi,
Thanks for your comment.
Are you on mac or windows?
PC
windows
Pingback: Selenium Software: All you need to know - Relevant Codes
Pingback: Testing career